实现验证码
导入依赖
1
2
3
4
5
6
|
<dependency>
<groupId>com.github.penggle</groupId>
<artifactId>kaptcha</artifactId>
<version>2.3.2</version>
</dependency>
|
定义验证码配置类
1
2
3
4
5
6
7
8
9
10
11
12
13
14
15
16
17
18
19
20
21
22
23
24
25
26
27
28
| package Rememberme.config;
import com.google.code.kaptcha.Producer;
import com.google.code.kaptcha.impl.DefaultKaptcha;
import com.google.code.kaptcha.util.Config;
import org.springframework.context.annotation.Bean;
import org.springframework.context.annotation.Configuration;
import java.util.Properties;
@Configuration
public class KaptchaConfig {
@Bean
public Producer kaptcha() {
Properties properties = new Properties();
properties.setProperty("kaptcha.image.width", "150");
properties.setProperty("kaptcha.image.height", "50");
properties.setProperty("kaptcha.textproducer.char.string", "0123456789");
properties.setProperty("kaptcha.textproducer.char.length", "4");
Config config = new Config(properties);
DefaultKaptcha defaultKaptcha = new DefaultKaptcha();
defaultKaptcha.setConfig(config);
return defaultKaptcha;
}
}
|
定义验证码的拦截器
1
2
3
4
|
public class kaptchaFilter extends UsernamePasswordAuthenticationFilter {
}
|
自定义拦截器配置类,实现UsernamePasswordAuthenticationFilter
然后设置默认的拦截器
1
2
3
|
public static final String KAPTCHA_KEY = "kaptcha";
private String kaptcha = KAPTCHA_KEY;
|
实现拦截器的验证方法attemptAuthentication
1
2
3
4
5
6
7
8
9
10
11
12
13
14
15
16
17
18
| @Override
public Authentication attemptAuthentication(HttpServletRequest request, HttpServletResponse response) throws AuthenticationException {
if (!request.getMethod().equalsIgnoreCase("post")) {
throw new KaptchaNotMatchException("请求异常" + request.getMethod());
}
String kaptcha = request.getParameter(getKaptcha());
String sessionKaptcha = (String) request.getSession().getAttribute("kaptcha");
if (!ObjectUtils.isEmpty(kaptcha)
&& !ObjectUtils.isEmpty(sessionKaptcha)
&& kaptcha.equalsIgnoreCase(sessionKaptcha)) {
return super.attemptAuthentication(request, response);
}
throw new KaptchaNotMatchException("验证码异常!");
}
|
自定义拦截器配置
1
2
3
4
5
6
7
8
9
10
11
12
13
14
15
16
17
18
19
20
21
22
23
24
25
26
27
28
29
30
31
32
33
34
35
36
37
38
| @Configuration
public class SecurityConfig extends WebSecurityConfigurerAdapter {
@Bean
public kaptchaFilter KaptchaFilter() throws Exception {
kaptchaFilter filter = new kaptchaFilter();
filter.setFilterProcessesUrl("/doLogin");
filter.setKaptcha("kaptcha");
filter.setAuthenticationManager(authenticationManagerBean());
filter.setAuthenticationSuccessHandler((request, response, authentication) -> {
Map<String, Object> result = new HashMap<>();
result.put("msg", "登录成功!");
result.put("status", "200");
result.put("用户信息", (User) authentication.getPrincipal());
response.setContentType("application/json;charset=UTF-8");
String s = new ObjectMapper().writeValueAsString(result);
response.getWriter().println(s);
});
filter.setAuthenticationFailureHandler((request, response, exception) -> {
Map<String, Object> result = new HashMap<>();
result.put("msg", "登录失败!!");
result.put("status", "400");
result.put("错误信息", exception.getMessage());
response.setContentType("application/json;charset=UTF-8");
String s = new ObjectMapper().writeValueAsString(result);
response.getWriter().println(s);
});
return filter;
}
}
|
注意点
1
2
3
4
5
|
filter.setKaptcha("kaptcha");
filter.setAuthenticationManager(authenticationManagerBean());
|
将自定义的拦截器交给容器
用来将自定义AuthenticationManager在工厂中进行暴露,可以在任何位置注入
1
2
3
4
5
6
7
8
9
10
11
12
13
14
15
16
17
18
19
20
21
22
23
24
25
26
27
28
29
30
31
32
33
34
35
36
37
38
39
40
41
42
43
44
45
46
47
48
49
|
@Configuration
public class SecurityConfig extends WebSecurityConfigurerAdapter {
@Bean
@Override
public AuthenticationManager authenticationManagerBean() throws Exception {
return super.authenticationManagerBean();
}
@Bean
public kaptchaFilter KaptchaFilter() throws Exception {
kaptchaFilter filter = new kaptchaFilter();
filter.setFilterProcessesUrl("/doLogin");
filter.setKaptcha("kaptcha");
filter.setAuthenticationManager(authenticationManagerBean());
filter.setAuthenticationSuccessHandler((request, response, authentication) -> {
Map<String, Object> result = new HashMap<>();
result.put("msg", "登录成功!");
result.put("status", "200");
result.put("用户信息", (User) authentication.getPrincipal());
response.setContentType("application/json;charset=UTF-8");
String s = new ObjectMapper().writeValueAsString(result);
response.getWriter().println(s);
});
filter.setAuthenticationFailureHandler((request, response, exception) -> {
Map<String, Object> result = new HashMap<>();
result.put("msg", "登录失败!!");
result.put("status", "400");
result.put("错误信息", exception.getMessage());
response.setContentType("application/json;charset=UTF-8");
String s = new ObjectMapper().writeValueAsString(result);
response.getWriter().println(s);
});
return filter;
}
}
|
替换自己的拦截器
1
2
|
http.addFilterAt(KaptchaFilter(), UsernamePasswordAuthenticationFilter.class);
|
1
2
3
4
5
6
7
8
9
10
11
12
13
14
15
16
17
18
19
20
21
22
23
24
25
26
27
28
|
@Configuration
public class SecurityConfig extends WebSecurityConfigurerAdapter {
@Override
protected void configure(HttpSecurity http) throws Exception {
http.authorizeRequests()
.mvcMatchers("/index").permitAll()
.mvcMatchers("/loginPages").permitAll()
.mvcMatchers("/vc.jpg").permitAll()
.anyRequest().authenticated()
.and()
.formLogin()
.loginPage("/loginPages")
.and()
.csrf().disable();
http.addFilterAt(KaptchaFilter(), UsernamePasswordAuthenticationFilter.class);
}
}
|
controller配置验证码拦截器发送的请求
1
2
3
4
5
6
7
8
9
| @RequestMapping("/vc.jpg")
public void Kaptcha(HttpServletResponse response, HttpSession session) throws IOException {
response.setContentType("image/png");
String text = producer.createText();
session.setAttribute("kaptcha", text);
BufferedImage image = producer.createImage(text);
ServletOutputStream stream = response.getOutputStream();
ImageIO.write(image, "jpg", stream);
}
|
前端实现请求接口
1
2
|
验证码: <input name="kaptcha" type="text"/> <img alt="" th:src="@{/vc.jpg}"><br>
|
实现记住我功能(暂未明悉)
登录时勾选 RememberMe 选项,然后重启服务端之后,在测试接口是否能免登录访问。
实现该功能的拦截器
RememberMeAuthenticationFilter
源码解析:
检测 中SecurityContext是否没有Authentication对象,如果实现请求,则RememberMeServices使用记住我身份验证令牌填充上下文。
具体 RememberMeServices 实现将具有由此筛选器调用的方法 RememberMeServices.autoLogin(HttpServletRequest, HttpServletResponse) 。如果此方法返回非 null Authentication 对象,则会将其传递给 AuthenticationManager,以便可以实现任何特定于身份验证的行为。生成的 Authentication (如果成功)将被放入 SecurityContext.
如果身份验证成功,则将 发布 InteractiveAuthenticationSuccessEvent 到应用程序上下文。如果身份验证不成功,则不会发布任何事件,因为这通常通过特定于 的应用程序事件进行 AuthenticationManager记录。
通常,无论身份验证是成功还是失败,都将允许请求继续。如果需要对经过身份验证的用户的目标进行某种控制, AuthenticationSuccessHandler 则可以注入
作者:
本·亚历克斯,卢克·泰
分析原理
当在SecurityConfig配置中开启了”记住我”功能之后,在进行认证时如果勾选了”记住我”选项,此时打开浏览器控制台,分析整个登录过程。首先当我们登录时,在登录请求中多了一个 RememberMe 的参数。
这个参数就是告诉服务器应该开启 RememberMe功能的。如果自定义登录页面开启 RememberMe 功能应该多加入一个一样的请求参数就可以啦。该请求会被 RememberMeAuthenticationFilter进行拦截然后自动登录
源码执行的方法
1
2
3
4
5
6
7
8
9
10
11
12
13
14
15
16
17
18
19
20
21
22
23
24
25
26
27
28
29
30
31
32
33
34
35
36
37
38
39
40
41
42
43
44
45
| private void doFilter(HttpServletRequest request, HttpServletResponse response, FilterChain chain)
throws IOException, ServletException {
if (SecurityContextHolder.getContext().getAuthentication() != null) {
this.logger.debug(LogMessage
.of(() -> "SecurityContextHolder not populated with remember-me token, as it already contained: '"
+ SecurityContextHolder.getContext().getAuthentication() + "'"));
chain.doFilter(request, response);
return;
}
Authentication rememberMeAuth = this.rememberMeServices.autoLogin(request, response);
if (rememberMeAuth != null) {
try {
rememberMeAuth = this.authenticationManager.authenticate(rememberMeAuth);
SecurityContext context = SecurityContextHolder.createEmptyContext();
context.setAuthentication(rememberMeAuth);
SecurityContextHolder.setContext(context);
onSuccessfulAuthentication(request, response, rememberMeAuth);
this.logger.debug(LogMessage.of(() -> "SecurityContextHolder populated with remember-me token: '"
+ SecurityContextHolder.getContext().getAuthentication() + "'"));
this.securityContextRepository.saveContext(context, request, response);
if (this.eventPublisher != null) {
this.eventPublisher.publishEvent(new InteractiveAuthenticationSuccessEvent(
SecurityContextHolder.getContext().getAuthentication(), this.getClass()));
}
if (this.successHandler != null) {
this.successHandler.onAuthenticationSuccess(request, response, rememberMeAuth);
return;
}
}
catch (AuthenticationException ex) {
this.logger.debug(LogMessage
.format("SecurityContextHolder not populated with remember-me token, as AuthenticationManager "
+ "rejected Authentication returned by RememberMeServices: '%s'; "
+ "invalidating remember-me token", rememberMeAuth),
ex);
this.rememberMeServices.loginFail(request, response);
onUnsuccessfulAuthentication(request, response, ex);
}
}
chain.doFilter(request, response);
}
|
(1)请求到达过滤器之后,首先判断 SecurityContextHolder 中是否有值,没值的话表示用户尚未登录,此时调用 autoLogin 方法进行自动登录。
(2)当自动登录成功后返回的rememberMeAuth 不为null 时,表示自动登录成功,此时调用 authenticate 方法对 key 进行校验,并且将登录成功的用户信息保存到 SecurityContextHolder 对象中,然后调用登录成功回调,并发布登录成功事件。需要注意的是,登录成功的回调并不包含 RememberMeServices 中的 1oginSuccess 方法。
(3)如果自动登录失败,则调用 remenberMeServices.loginFail方法处理登录失败回调。onUnsuccessfulAuthentication 和 onSuccessfulAuthentication 都是该过滤器中定义的空方法,并没有任何实现这就是 RememberMeAuthenticationFilter 过滤器所做的事情,成功将 RememberMeServices的服务集成进来
RememberMeServices
这里一共定义了三个方法:
- autoLogin 方法可以从请求中提取出需要的参数,完成自动登录功能。
- loginFail 方法是自动登录失败的回调。
- 1oginSuccess 方法是自动登录成功的回调。
实现
传统 web 开发记住我实现
通过源码分析得知必须在认证请求中加入参数remember-me值为”true,on,yes,1”其中任意一个才可以完成记住我功能,这个时候修改认证界面:
1
2
3
4
5
6
7
8
9
10
11
12
13
14
15
16
| <!DOCTYPE html>
<html lang="en">
<head>
<meta charset="UTF-8">
<title>登录</title>
</head>
<body>
<h1>用户登录</h1>
<form method="post" th:action="@{/doLogin}">
用户名:<input name="uname" type="text"/><br>
密码:<input name="passwd" type="password"/><br>
记住我: <input type="checkbox" name="remember-me" value="on|yes|true|1"/><br>
<input type="submit" value="登录"/>
</form>
</body>
</html>
|
配置中开启记住我
1
2
3
4
5
6
7
8
9
10
11
12
13
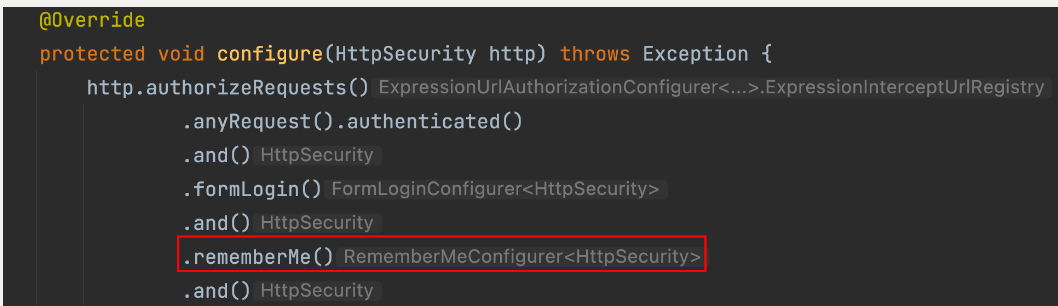
| @Configuration
public class SecurityConfig extends WebSecurityConfigurerAdapter {
@Override
protected void configure(HttpSecurity http) throws Exception {
http.authorizeRequests()
.....
.and()
.rememberMe()
.and()
.csrf().disable();
}
}
|
前后端分离开发记住我实现
自定义认证类 LoginFilter
1
2
3
4
5
6
7
8
9
10
11
12
13
14
15
16
17
18
19
20
21
22
23
24
25
26
27
28
29
30
31
32
33
34
|
public class LoginFilter extends UsernamePasswordAuthenticationFilter {
@Override
public Authentication attemptAuthentication(HttpServletRequest request, HttpServletResponse response) throws AuthenticationException {
System.out.println("========================================");
if (!request.getMethod().equals("POST")) {
throw new AuthenticationServiceException("Authentication method not supported: " + request.getMethod());
}
if (request.getContentType().equalsIgnoreCase(MediaType.APPLICATION_JSON_VALUE)) {
try {
Map<String, String> userInfo = new ObjectMapper().readValue(request.getInputStream(), Map.class);
String username = userInfo.get(getUsernameParameter());
String password = userInfo.get(getPasswordParameter());
String rememberValue = userInfo.get(AbstractRememberMeServices.DEFAULT_PARAMETER);
if (!ObjectUtils.isEmpty(rememberValue)) {
request.setAttribute(AbstractRememberMeServices.DEFAULT_PARAMETER, rememberValue);
}
System.out.println("用户名: " + username + " 密码: " + password + " 是否记住我: " + rememberValue);
UsernamePasswordAuthenticationToken authRequest = new UsernamePasswordAuthenticationToken(username, password);
setDetails(request, authRequest);
return this.getAuthenticationManager().authenticate(authRequest);
} catch (IOException e) {
e.printStackTrace();
}
}
return super.attemptAuthentication(request, response);
}
}
|
自定义 RememberMeService
1
2
3
4
5
6
7
8
9
10
11
12
13
14
15
16
17
18
19
20
21
22
|
public class MyPersistentTokenBasedRememberMeServices extends PersistentTokenBasedRememberMeServices {
public MyPersistentTokenBasedRememberMeServices(String key, UserDetailsService userDetailsService, PersistentTokenRepository tokenRepository) {
super(key, userDetailsService, tokenRepository);
}
@Override
protected boolean rememberMeRequested(HttpServletRequest request, String parameter) {
String paramValue = request.getAttribute(parameter).toString();
if (paramValue != null) {
if (paramValue.equalsIgnoreCase("true") || paramValue.equalsIgnoreCase("on")
|| paramValue.equalsIgnoreCase("yes") || paramValue.equals("1")) {
return true;
}
}
return false;
}
}
|
配置记住我
1
2
3
4
5
6
7
8
9
10
11
12
13
14
15
16
17
18
19
20
21
22
23
24
25
26
27
28
29
30
31
32
33
34
35
36
37
38
39
40
41
42
43
44
45
46
47
48
49
50
51
52
53
54
55
56
57
58
59
60
61
62
63
64
65
66
67
68
69
70
71
72
73
74
75
76
77
78
79
80
81
82
83
84
85
86
87
88
89
90
91
92
93
94
95
96
97
| @Configuration
public class SecurityConfig extends WebSecurityConfigurerAdapter {
@Bean
public UserDetailsService userDetailsService() {
return inMemoryUserDetailsManager;
}
@Override
protected void configure(AuthenticationManagerBuilder auth) throws Exception {
auth.userDetailsService(userDetailsService());
}
@Override
@Bean
public AuthenticationManager authenticationManagerBean() throws Exception {
return super.authenticationManagerBean();
}
@Bean
public LoginFilter loginFilter() throws Exception {
LoginFilter loginFilter = new LoginFilter();
loginFilter.setFilterProcessesUrl("/doLogin");
loginFilter.setUsernameParameter("uname");
loginFilter.setPasswordParameter("passwd");
loginFilter.setAuthenticationManager(authenticationManagerBean());
loginFilter.setRememberMeServices(rememberMeServices());
loginFilter.setAuthenticationSuccessHandler((req, resp, authentication) -> {
Map<String, Object> result = new HashMap<String, Object>();
result.put("msg", "登录成功");
result.put("用户信息", authentication.getPrincipal());
resp.setContentType("application/json;charset=UTF-8");
resp.setStatus(HttpStatus.OK.value());
String s = new ObjectMapper().writeValueAsString(result);
resp.getWriter().println(s);
});
loginFilter.setAuthenticationFailureHandler((req, resp, ex) -> {
Map<String, Object> result = new HashMap<String, Object>();
result.put("msg", "登录失败: " + ex.getMessage());
resp.setStatus(HttpStatus.INTERNAL_SERVER_ERROR.value());
resp.setContentType("application/json;charset=UTF-8");
String s = new ObjectMapper().writeValueAsString(result);
resp.getWriter().println(s);
});
return loginFilter;
}
@Override
protected void configure(HttpSecurity http) throws Exception {
http.authorizeHttpRequests()
.anyRequest().authenticated()
.and()
.formLogin()
.and()
.rememberMe()
.rememberMeServices(rememberMeServices())
.and()
.exceptionHandling()
.authenticationEntryPoint((req, resp, ex) -> {
resp.setContentType(MediaType.APPLICATION_JSON_UTF8_VALUE);
resp.setStatus(HttpStatus.UNAUTHORIZED.value());
resp.getWriter().println("请认证之后再去处理!");
})
.and()
.logout()
.logoutRequestMatcher(new OrRequestMatcher(
new AntPathRequestMatcher("/logout", HttpMethod.DELETE.name()),
new AntPathRequestMatcher("/logout", HttpMethod.GET.name())
))
.logoutSuccessHandler((req, resp, auth) -> {
Map<String, Object> result = new HashMap<String, Object>();
result.put("msg", "注销成功");
result.put("用户信息", auth.getPrincipal());
resp.setContentType("application/json;charset=UTF-8");
resp.setStatus(HttpStatus.OK.value());
String s = new ObjectMapper().writeValueAsString(result);
resp.getWriter().println(s);
})
.and()
.csrf().disable();
http.addFilterAt(loginFilter(), UsernamePasswordAuthenticationFilter.class);
}
@Bean
public RememberMeServices rememberMeServices() {
return new MyPersistentTokenBasedRememberMeServices(UUID.randomUUID().toString(), userDetailsService(), new InMemoryTokenRepositoryImpl());
}
}
|
说明
关于实现记住我功能 部分的代码是由@编程不良人的学习教程中提供的,仅作为自己的学习参考使用!
作者教程链接 : Spring Security 最新实战教程