Python框架之UnitTest
UnitTest框架测试
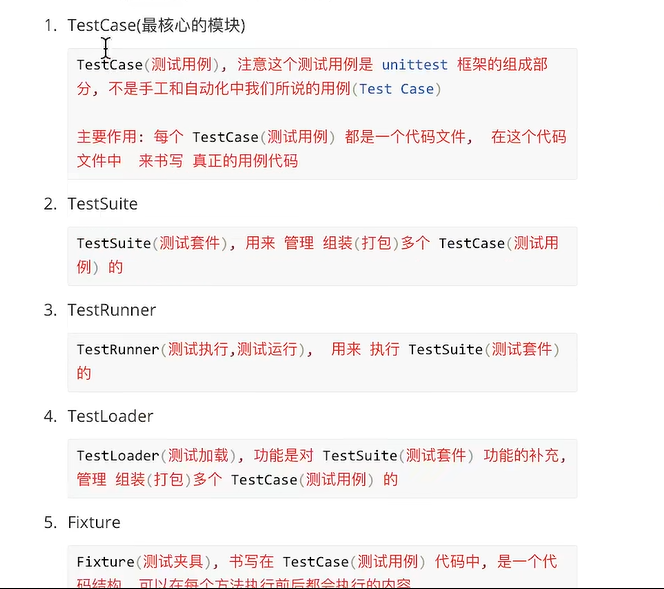
一. TestCase 1 2 每一个TestCase(测试用例)都是一个代码文件, 在其中来书写真正的测试用例 代码必须按照标识符的规则来书写
1 2 3 4 导包 自定义测试类 在测试类中书写测试用例 执行用例
1 2 3 4 5 6 7 8 9 10 11 12 import unittestclass TestDemo (unittest.TestCase): '自定义测试案例类,需要继承测试模块中中的TestCase类即可' def test_method1 (self ): print ("测试方法一" ) def test_method2 (self ): print ("测试方法二" )
1 2 3 4 5 代码文件的名字以数字开头 代码文件名字中有空格 代码文件中有中文 其他特殊符号 (数字、字母、下滑线组成,不能以数字开头)
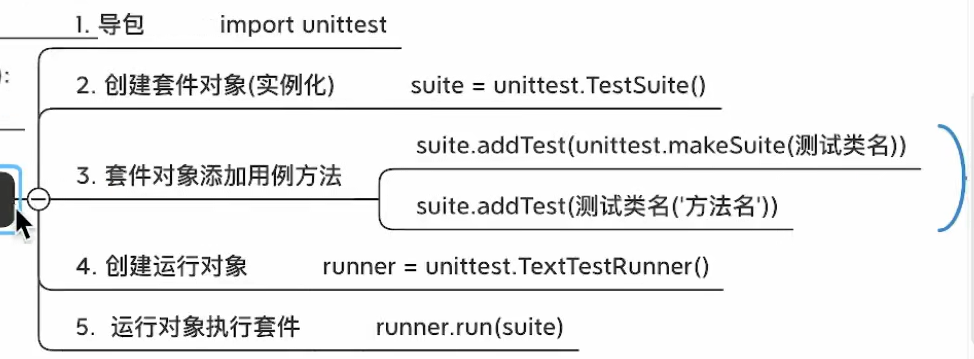
二. 使用UnitTest中的TestSuite管理测试用例TestCase 1 2 3 4 步骤: 导包 实例化套件对象(TestSuite) 使用套件对象添加用例方法
1 2 3 4 5 6 7 8 9 10 11 12 13 import unittestfrom RayStuDayOne.testCxase import TestDemosuite = unittest.TestSuite() suite.addTest(TestDemo('test_method1' )) suite.addTest(TestDemo('test_method2' )) suite.addTest(unittest.makeSuite(类名))
1 2 3 注意 : 1. test方法必须以 test_ 开头,不然就不会生成测试方法,也就不会执行 2.
三. 使用TestRunner执行测试套件(TestSuite) 1 2 testSuite : 作用是打包管理测试用例(testCase) TestRunner : 执行TestSuite(套件)
1 2 3 导包 实例化运行对象 使用运行对象去执行套件对象
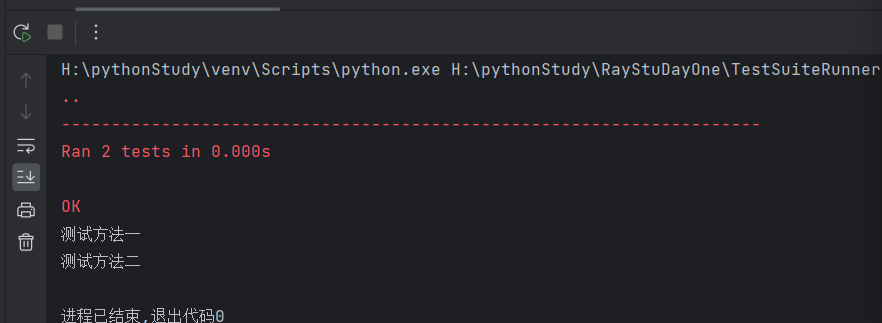
1 2 3 4 5 6 7 8 9 10 11 12 13 14 15 16 17 import unittestfrom RayStuDayOne.testCxase import TestDemosuite = unittest.TestSuite() suite.addTest(TestDemo('test_method1' )) suite.addTest(TestDemo('test_method2' )) suite.addTest(unittest.makeSuite(类名)) runner = unittest.TextTestRunner() runner.run(suite)
整体测试实现:
1 2 def add (a, b ): return a + b
1 2 3 4 5 6 步骤 导包 自定义测试类 在测试类中书写测试用例
1 2 3 4 5 6 7 8 9 10 11 12 13 14 15 16 17 18 19 20 21 22 23 24 25 26 27 28 import unittestfrom Demo.tools import addclass testAdd (unittest.TestCase): """自定义测试类,实现测试方法的书写""" def test_demo (self ): if add(1 , 2 ) == 3 : print ("测试通过!" ) else : print ("测试不通过!" ) def test_demo1 (self ): if add(10 , 11 ) == 22 : print ("测试通过!" ) else : print ("测试不通过!" ) def test_demo2 (self ): if add(11 , 2 ) == 13 : print ("测试通过!" ) else : print ("测试不通过!" )
1 2 3 4 步骤 导包 实例化套件对象(TestSuite) 使用套件对象添加用例方法
1 2 3 4 5 6 7 8 9 10 11 12 13 14 15 16 17 18 19 import unittestfrom Demo.testDemo import testAddsuite = unittest.TestSuite() suite.addTest(unittest.makeSuite(testAdd)) runner = unittest.TextTestRunner() runner.run(suite)
TestLoader(测试加载) 1 2 3 4 5 6 7 8 9 10 11 12 对TestSuite进行补充 管理多个TestCase 比如: 如果TestCase的代码文件有很多(10,20,30) 步骤: 1. 导包 2. 实例化测试加载对象 并添加测试用例 ---- 》 得到的是suite对象 3. 实例化运行对象 4. 运行对象执行套件对象
1 2 3 4 5 6 7 8 9 10 11 12 13 14 import unittestimport Casesuite = unittest.TestLoader().discover('Case' , 'test*.py' ) runner = unittest.TextTestRunner() runner.run(suite)
还可以简化
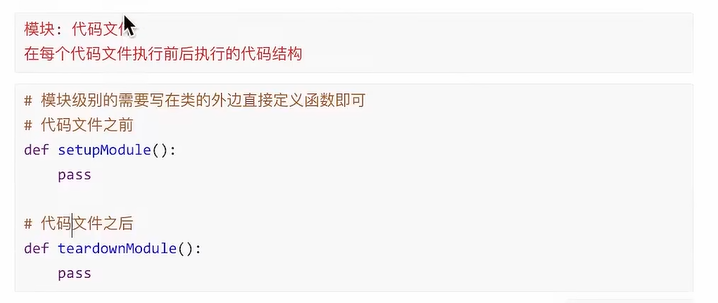
Fixtrue ( 测试夹具) 1 2 3 4 5 是一种 代码结构 在某种特定情况下, 会自动执行 需要就写 ,不需要就不用写
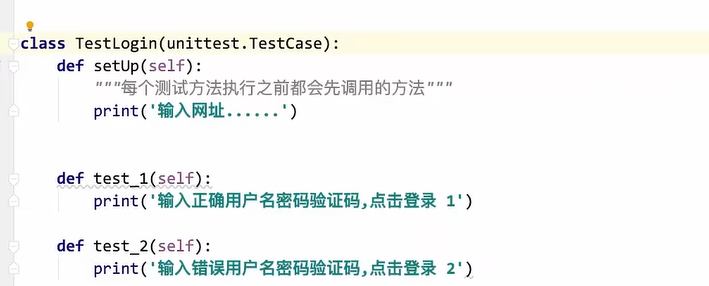
1 2 在每个测试方法(用例代码) 执行前后都会自动调用的结构
1 2 3 4 5 6 7 8 9 def setup (self ): pass def teardown (self ): pass
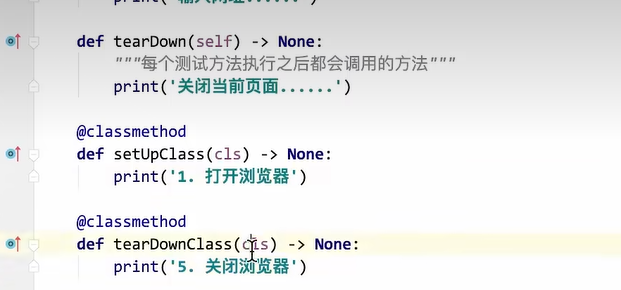
1 在每个测试类中所有方法执行前后, 都会自动调用的结构(在整个类中, 执行之前执行之后各一次)
1 2 3 4 5 6 7 8 9 10 @classmethod def setupClass (cls ): pass @classmethod def tearDown (self ): pass
案例 1 2 3 4 5 6 7 打开浏览器 ------------类级别 输入网址 ------------方法级别 输入用户名密码 验证吗点击登录 ---------测试方法 关闭当前页 ------------方法级别 关闭浏览器------------类级别 +++++++++++++++++++++++++++++++++++++ 一值重复上述的结构
断言 断言的定义
断言的定义
概念: 断言就是让程序代替人为判断测试程序执行结果是否符合预期结果的过程。
断言的意义
断言结果
1 2 3 4 5 True: 用例通过 False: 用例未通过
常见的断言方法
序号
断言方法
断言描述
1
assertTure(expr,msg = None)
验证expr是否为true,如果为false 。则fail
2
assertFalse(expr,msg = None)
验证expr是否为false,如果为true 。则fail
3
assertEqual(expected,actual,msg = None)
验证expected == actual, 不等则 fail
4
assertNotEqual(first,second)
验证first != second ,相等为 fail
。。。。有很多
1 2 3 4 5 6 7 self.aseertEqual(预期结果,实际结果) 相等 ,则预期通过。不相等则是不通过。 self.assertIn(预期结果,实际结果) 判读预期结果是否包含在实际结果中 实际>预期 包含则为true
1 2 3 4 5 6 7 8 9 10 11 12 def test_demo (self ): self.assertEqual(3 , add(1 , 2 )) def test_demo1 (self ): if add(10 , 11 ) == 22 : print ("测试通过!" ) else : print ("测试不通过!" )
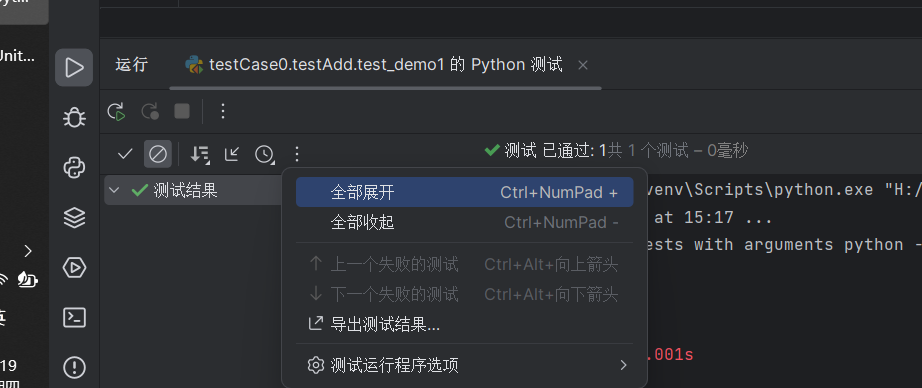
他不会生成结果,如果测试失败他就不会通过,如果成功, 那么就会显示ok, 然后通过下面的步骤就可以导出测试报告。
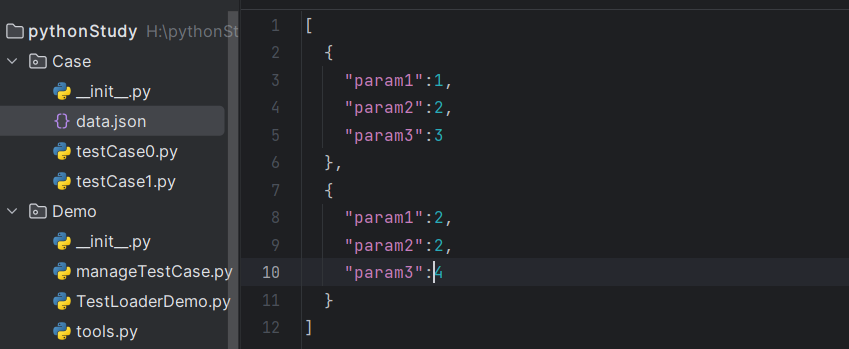
参数化 1 2 3 4 5 6 7 参数化 在测试方法中, 通过使用 变量来代替具体的测试数据, 然后使用传参的方法将 数据传递给方法变量。 好处 : 相似的代码不需要重复读写 日常场景: 测试数据一般放在json数据中 使用读取json文件, 提取我们需要的数据
安装相关的插件
通过终端 : 输入 pip install parameterized即可
步骤 1 2 3 4 5 6 步骤: 1. 导包 2. 定义测试类 3. 书写测试方法(用到的测试数据使用变量代替) 4. 组织测试数据并传参 (数据和顺序需要保证一致)
1 2 3 4 5 6 7 8 9 10 11 12 13 14 15 16 17 18 import unittestfrom parameterized import parameterizedfrom Demo.tools import addclass testAddOne (unittest.TestCase): """自定义测试类,实现测试方法的书写""" @parameterized.expand(data ) def test_demo (self, paramA, paramB, expect ): self.assertEqual(expect, add(paramA, paramB))
1 2 3 4 5 6 7 8 9 10 11 12 13 14 15 16 组织测试数据并传参 # 组织测试数据 组织数据的格式 # [(),(),()....] 或者 [[],[],[],[]....] data = [ (1, 2, 3), (11, 21, 32), ... ] 传参通过装饰器的方法(也就是Java中的注解形式) @parameterized.expand(data) # 使用装饰器的方法传参 def test_demo(self, paramA, paramB, expect)
参数化二 通过导入测试化数据的方式来完成测试
导入测试化数据
完成对数据的读取和转换(通过定义方法完成)
1 2 3 4 5 6 7 8 9 10 def build_Data (): data = [] with open ('H:\pythonStudy\Case\data.json' , encoding='UTF-8' ) as f: result = json.load(f) for i in result: data.append((i.get('param1' ), i.get('param2' ), i.get('param3' ))) return data
在自定义测试类中,通过装饰器传参导入数据
1 2 3 4 5 6 7 8 class testAddOne (unittest.TestCase): """自定义测试类,实现测试方法的书写""" @parameterized.expand(build_Data( ) def test_demo (self, paramA, paramB, expect ): self.assertEqual(expect, add(paramA, paramB))
跳过 1 对一些未完成的 ,或者不满足测试条件的测试函数和测试类,可以跳过执行
使用方法 1 2 3 4 5 6 直接将测试函数标记成为跳过 @unittest.skip('代码为完成') # 根据条件判断测试函数是否跳过 @unittest.skipIf(condition,reason)
实现
1 2 3 4 5 6 7 8 9 10 11 12 13 14 15 16 17 18 19 20 21 22 23 24 25 26 class testAddOne (unittest.TestCase): """自定义测试类,实现测试方法的书写""" version = 30 @parameterized.expand(build_Data( ) def test_demo (self, paramA, paramB, expect ): self.assertEqual(expect, add(paramA, paramB)) @unittest.skipIf(version >= 30 , '版本号大于等于30 ,不用测试' ) def test_demo1 (self ): if add(10 , 11 ) == 22 : print ("测试通过!" ) else : print ("测试不通过!" ) @unittest.skip("不想测试了" def test_demo2 (self ): if add(11 , 2 ) == 13 : print ("测试通过!" ) else : print ("测试不通过!" )
测试报告的生成 1 2 只有testCase的才能生成 ,使用testSuite 和 testRunner包装的套件对象无法生成
使用第三方的类库生成报告
1 2 3 4 5 将第三方的测试运行类模块放在当前代码的目录中 步骤 : 1. 导包unittest 2. 使用套件对象 ,加载对象, 去添加测试用例 3. 实例化第三方的运行对象, 并运行套件对象
